BCSI Guides Truss Installation Process, Pt 2
Originally Published by: SBCA Magazine — August 8, 2023
SBCA appreciates your input; please email us if you have any comments or corrections to this article.
Best Practices for Truss Installation (Part 2)
Design & Package Documents Pre-Install Review
Before handling a truss, it's vital to examine the truss design drawings (TPDs), truss package documents (TPDs) and all supplied jobsite package material with the installation team. Having a cohesive understanding of the project design, structural system, bearing locations, related installation conditions, and safety measures at the beginning streamlines the process, prevents mistakes, incidents, and costly corrections. It’s a simple step toward proactive communication and it has a compounding impact that results in a well-organized and productive on-site workflow leading to a safe, cost-conscious quality build. Begin installing trusses only after the TTDs, TPDs, and supporting material have been reviewed as a team, questions have been clarified, and unsatisfactory conditions between the plan, available materials, and/or site have been addressed.
Key Techniques for Proper Installation
- Connect all load bearing supports (walls, columns, headers, beams, etc.) before installing trusses.
- Note, stopping mid-install to straighten and/or brace load bearing supports is dangerous.
- The spreader bar prevents lateral bending and should attach to top chords and webs at 10-foot intervals.
- Locate the spreader bar at or above mid-height of the truss to prevent overturning.
- For single trusses between 30 – 60 feet, use a spreader bar 1/2 to 2/3 of the truss length.
- Attach Truss to the Spreader Bar with lines that slope inward or “toe-in.”
- For single Trusses over 60 feet use a spreader bar 2/3 to 3/4 of the truss length in conjunction with a bracing plan provided by the registered design professional (RDP).
- Install lateral restraints and diagonal bracing to prevent trusses from toppling during installation.
- Erect trusses using the design spacing indicated, keeping the trusses vertical and parallel to one another.
- Anchor trusses securely at bearing points.
- Install trusses no more than plus or minus 1/4" from TPD location.
- Refer to the construction documents (CDs), the TDDs, or the TPD for the hanger locations.
- Install all permanent individual truss member restraint and bracing or member reinforcements depicted on the TDDs, BCSI-B3, and the CDs.
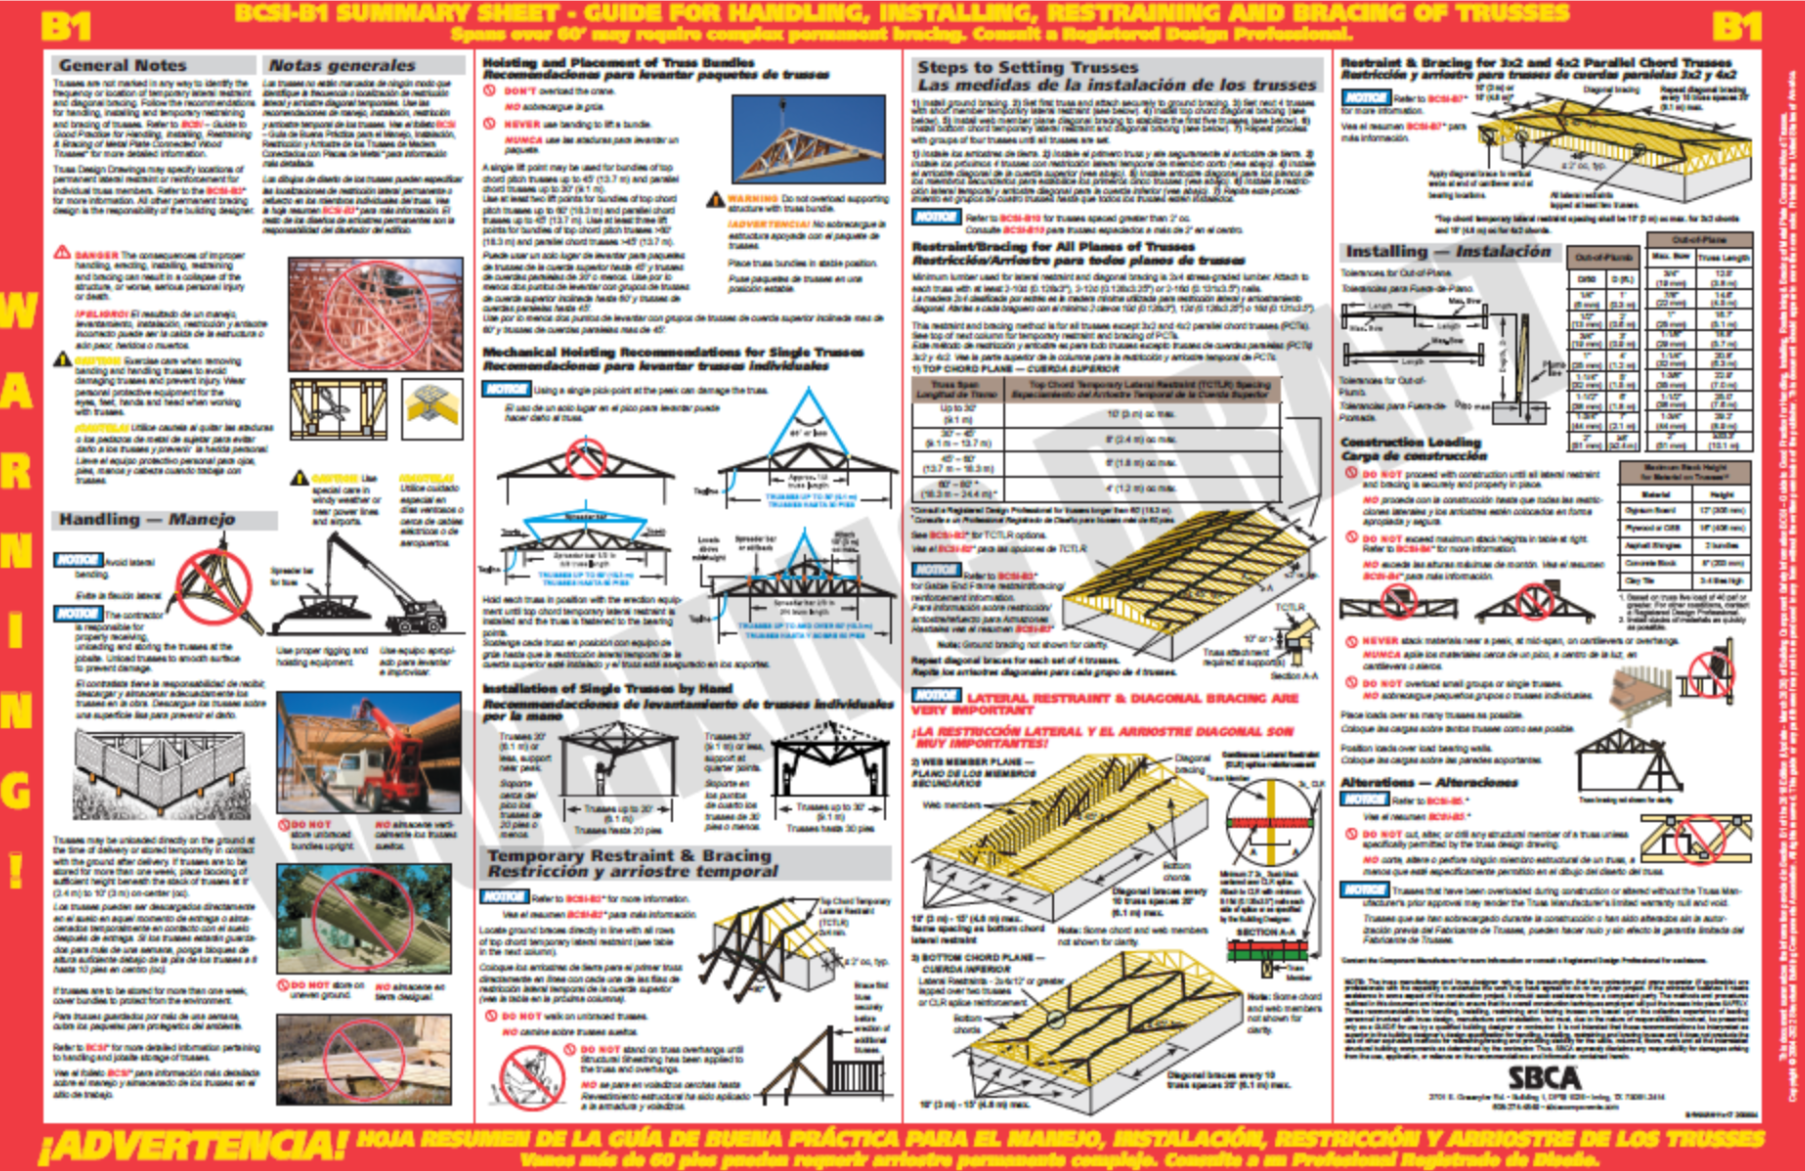
The BCSI B-1 Summary Sheet contains further information on these techniques, and others, for proper field installation, and is included in SBCA’s standard Jobsite Package.
Safety Precautions During Construction
- During construction, distribute material and equipment loads on the trusses to stay within the design load limit for each truss.
- Make sure to restrain and brace trusses sufficiently before placing any construction loads on them.
- Only install HVAC units, fire sprinklers, etc., on trusses if the trusses have been designed to accommodate these specific loads.
Truss installation is a pivotal part of the construction process demands diligence, intentional communication, and strict adherence to safety protocols. Building professionals can cultivate a consistent truss installation process that improves the quality, integrity, and caliber of builds across every phase of the project by studying, understanding, and utilizing BCSI’s checklists, instructions, and information.
Pro-Tip! When in doubt, always consult with the project’s registered design professional and/or component manufacturer.